
Using offline aerial imagery
Mapeo Mobile
For using offline aerial imagery with Mapeo Mobile, please click here to see the documentation.
Mapeo Desktop
These instructions were written with POSIX systems in mind (Linux, macOS). Windows users may have to infer some of the differences in the commands shown.
Automatic Import
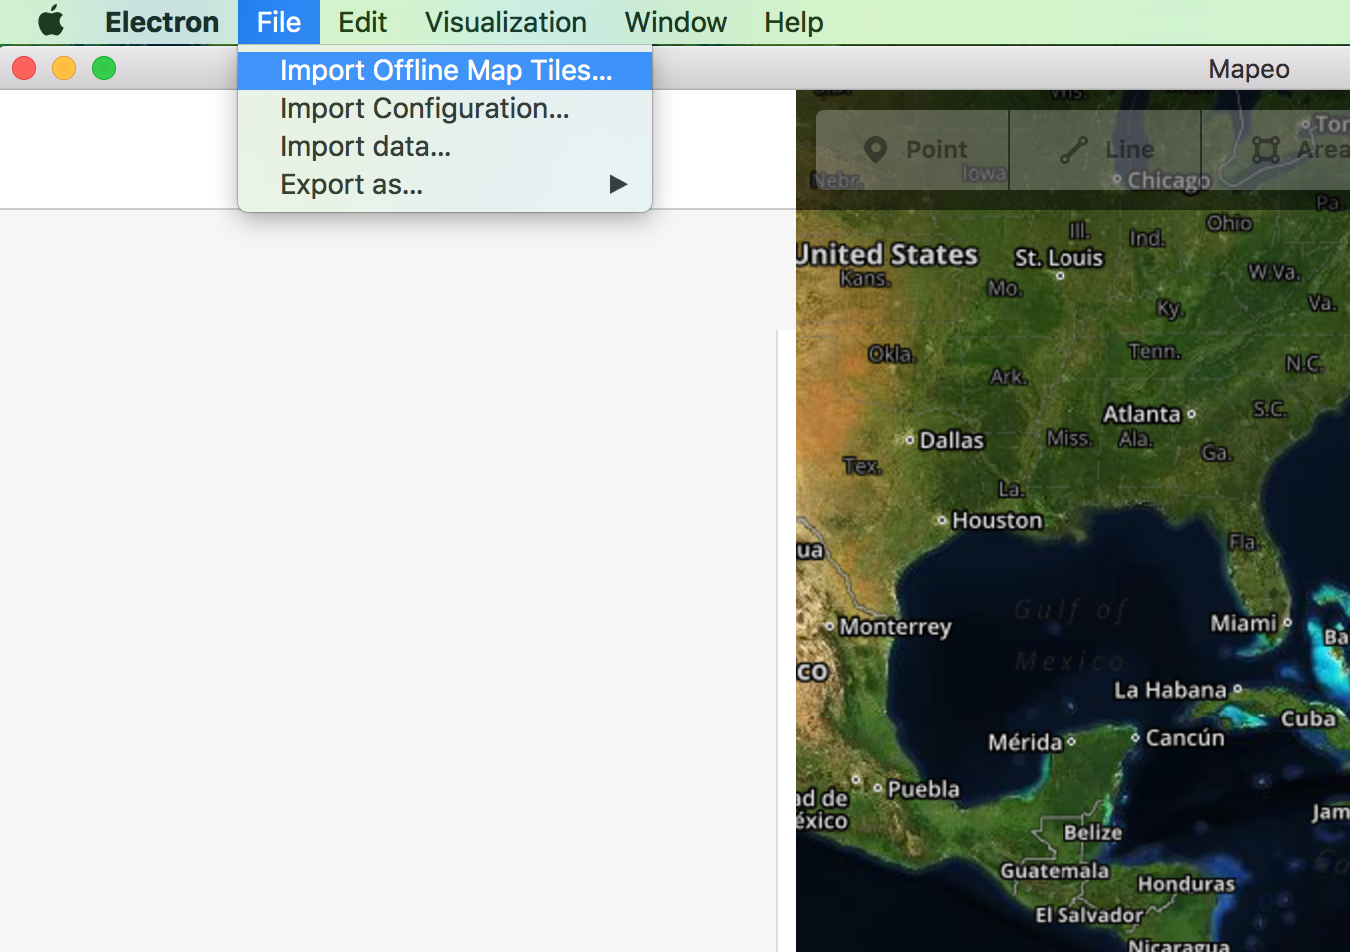
Mapeo has a built-in tile importer. Go to File->Import Offline Map Tiles... and
point Mapeo to the tiles you want to use. It accepts a directory of tiles
organized by /{zoom}/{x}/{y}. You can change these parameters
when you launch Mapeo desktop in the background imagery layers menu.
The automatic importer attempts to use .jpg, .png, and .jpeg as the
format for each tile.
It will accept .asar packages as well as .tar files. It does not currently
support the .mbtiles format, PRs
welcome.
Manual Import
You can also put styles and tiles into the following directory:
USERDATA/Mapeo/styles/default
USERDATA is the per-user application data directory, which by default points to:
%APPDATA%on Windows$XDG_CONFIG_HOMEor ~/.config on Linux~/Library/Application Supporton macOS
Similar to Mapeo Mobile, this expects these files directly under this default folder:
style.json
fonts/
tiles/
  my-offline-tiles.asar
  ...maybe more
After moving files to the directory (if you aren't using automatic import), try manually refreshing Mapeo to see your new tiles.
Map Editor
Once you've imported your tiles, in the Map Editor, you need to follow some more steps to get the OpenStreetMap iD editor to recognize your new tiles.
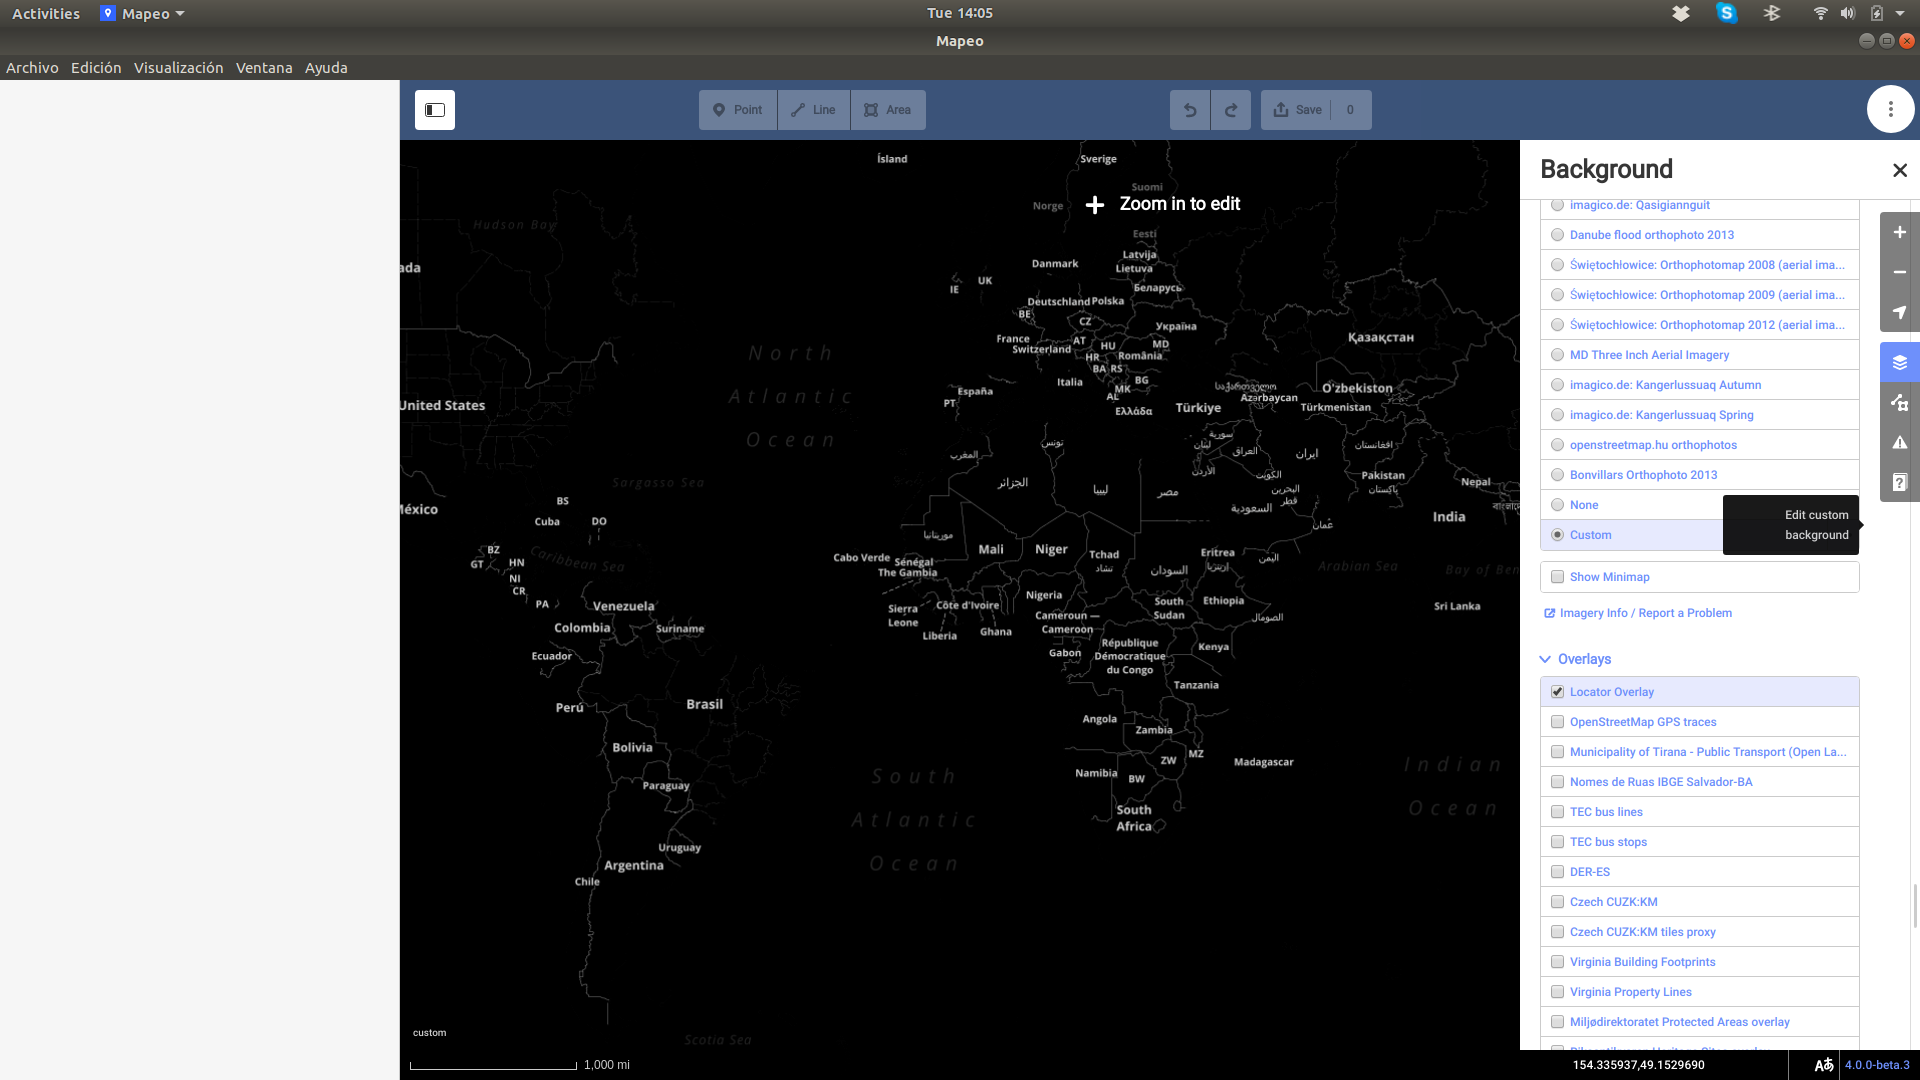
- Press 'b' to open the imagery layers menu.
- Choose 'Custom' from the bottom of the list (you need to scroll quite a lot).
- Input the appropirate URL (continue reading)
If you used a tar file, you can use the default setting:
http://localhost:5000/styles/default/tiles/{zoom}/{x}/{y}
If you used an .asar file or used Manual Import, you need to specify the name
of your asar file that contains the tiles you want to view:
http://localhost:5000/styles/default/tiles/my-offline-tiles/{zoom}/{x}/{y}
Map Filter
Map Filter requires a style.json file in the default directory
TODO: document how to get this file, or perhaps we should generate one for the user!
Download the Tile Data
If you don't have tile data already, you can use a commandline tool that we created to do this. First, make sure you have npm installed.
Next, install tile-dl:
npm install --global tile-dl
tile-dl needs to be told the latitude, longitude, zoom level, and radius of
the area to download locally.
To find the latitude and longitude of the area, open Mapeo Desktop and navigate to the rough centre of the area you're interested in. In the bottom right hand corner of the screen you'll see two numbers separated by a comma. These are your current longitude and latitude (in that order). Note them.
Let's store the template for a map tile provider for use by tile-dl:
$ echo 'https://c.tiles.mapbox.com/v4/digitalglobe.0a8e44ba/{z}/{x}/{y}.png?access_token=pk.eyJ1IjoiZGlnaXRhbGdsb2JlIiwiYSI6ImNqOGRmNW9qZjBudmgzMnA1a294OGRtNm8ifQ.06mo-nDisy4KmqjYxEVwQw' > url_template
On Windows
Set url_template="https://c.tiles.mapbox.com/v4/digitalglobe.0a8e44ba/{z}/{x}/{y}.png?access_token=pk.eyJ1IjoiZGlnaXRhbGdsb2JlIiwiYSI6ImNqOGRmNW9qZjBudmgzMnA1a294OGRtNm8ifQ.06mo-nDisy4KmqjYxEVwQw"
Now you can invoke the tile-dl program:
$ tile-dl -t "$(cat url_template)" --lon=-122.2632601 --lat=37.8027446 \
          --radius 0.1 --zoom 12 --output tiles/{z}/{x}/{y}.png
On Windows
tile-dl -t %url_template% --lon=-122.2632601 --lat=37.8027446 --radius 0.1 --zoom 12 --output tiles/{z}/{x}/{y}.png
This example downloads the area around Oakland, California. You can tweak the parameters to meet your needs:
lat: The latitude at the centre of your download area.lon: The longitude at the centre of your download area.radius: The size of the area to download, in kilometres.zoom: The zoom level to use. 9 is a very wide area; 11 is a large area; 13 is the size of a village; 16 is the size of a small road.
The above zoom level figures are very rough. Experiment with small radii and see how the results look: you can open the resulting JPGs or PNGs with an image viewer and see if they look appropriate to your needs.
Map tile providers offer these satellite images for free; please don't abuse their generosity by downloading more than what you need.